Configuring SearchStax for your Sitecore Solution
- Authors

- Name
- David Goosem
In a previous post I discussed the management conundrum of Solr and Sitecore and the challenges faced with their differing eco-systems. This post will be more of a technical guide looking at how to configure SearchStax for your Sitecore Solution.
Firstly, lets talk about environments. It's important to work out what you actually need to have provisioned by SearchStax up front. This is usually determined by how many environments you need and what they're going to be used for..
For a local development machine it generally makes more sense to use a local Solr install.
For a functional testing environment, perhaps it makes sense to just opt for a single node ~$50USD/month from SearchStax.
For Production environments you'll potentially want the clustered configuration and optionally a variation of DR (options are Cold, Warm and Hot).
Each of these comes at varying costs and you can optionally take on support or have your SearchStax resources provisioned with additional security (VNET, VPC peering).
See here for pricing details or contact SearchStax or your Sitecore partner directly.
Once you've determined what it is you need and SeachStax has provisioned your resources and/or hooked you up with an account with the portal access so you can manage/do it yourself, you will see your environments which should look something like this:
*** Note: Remember to check what version of Solr you need for your solution and select the right version for your version of Sitecore ***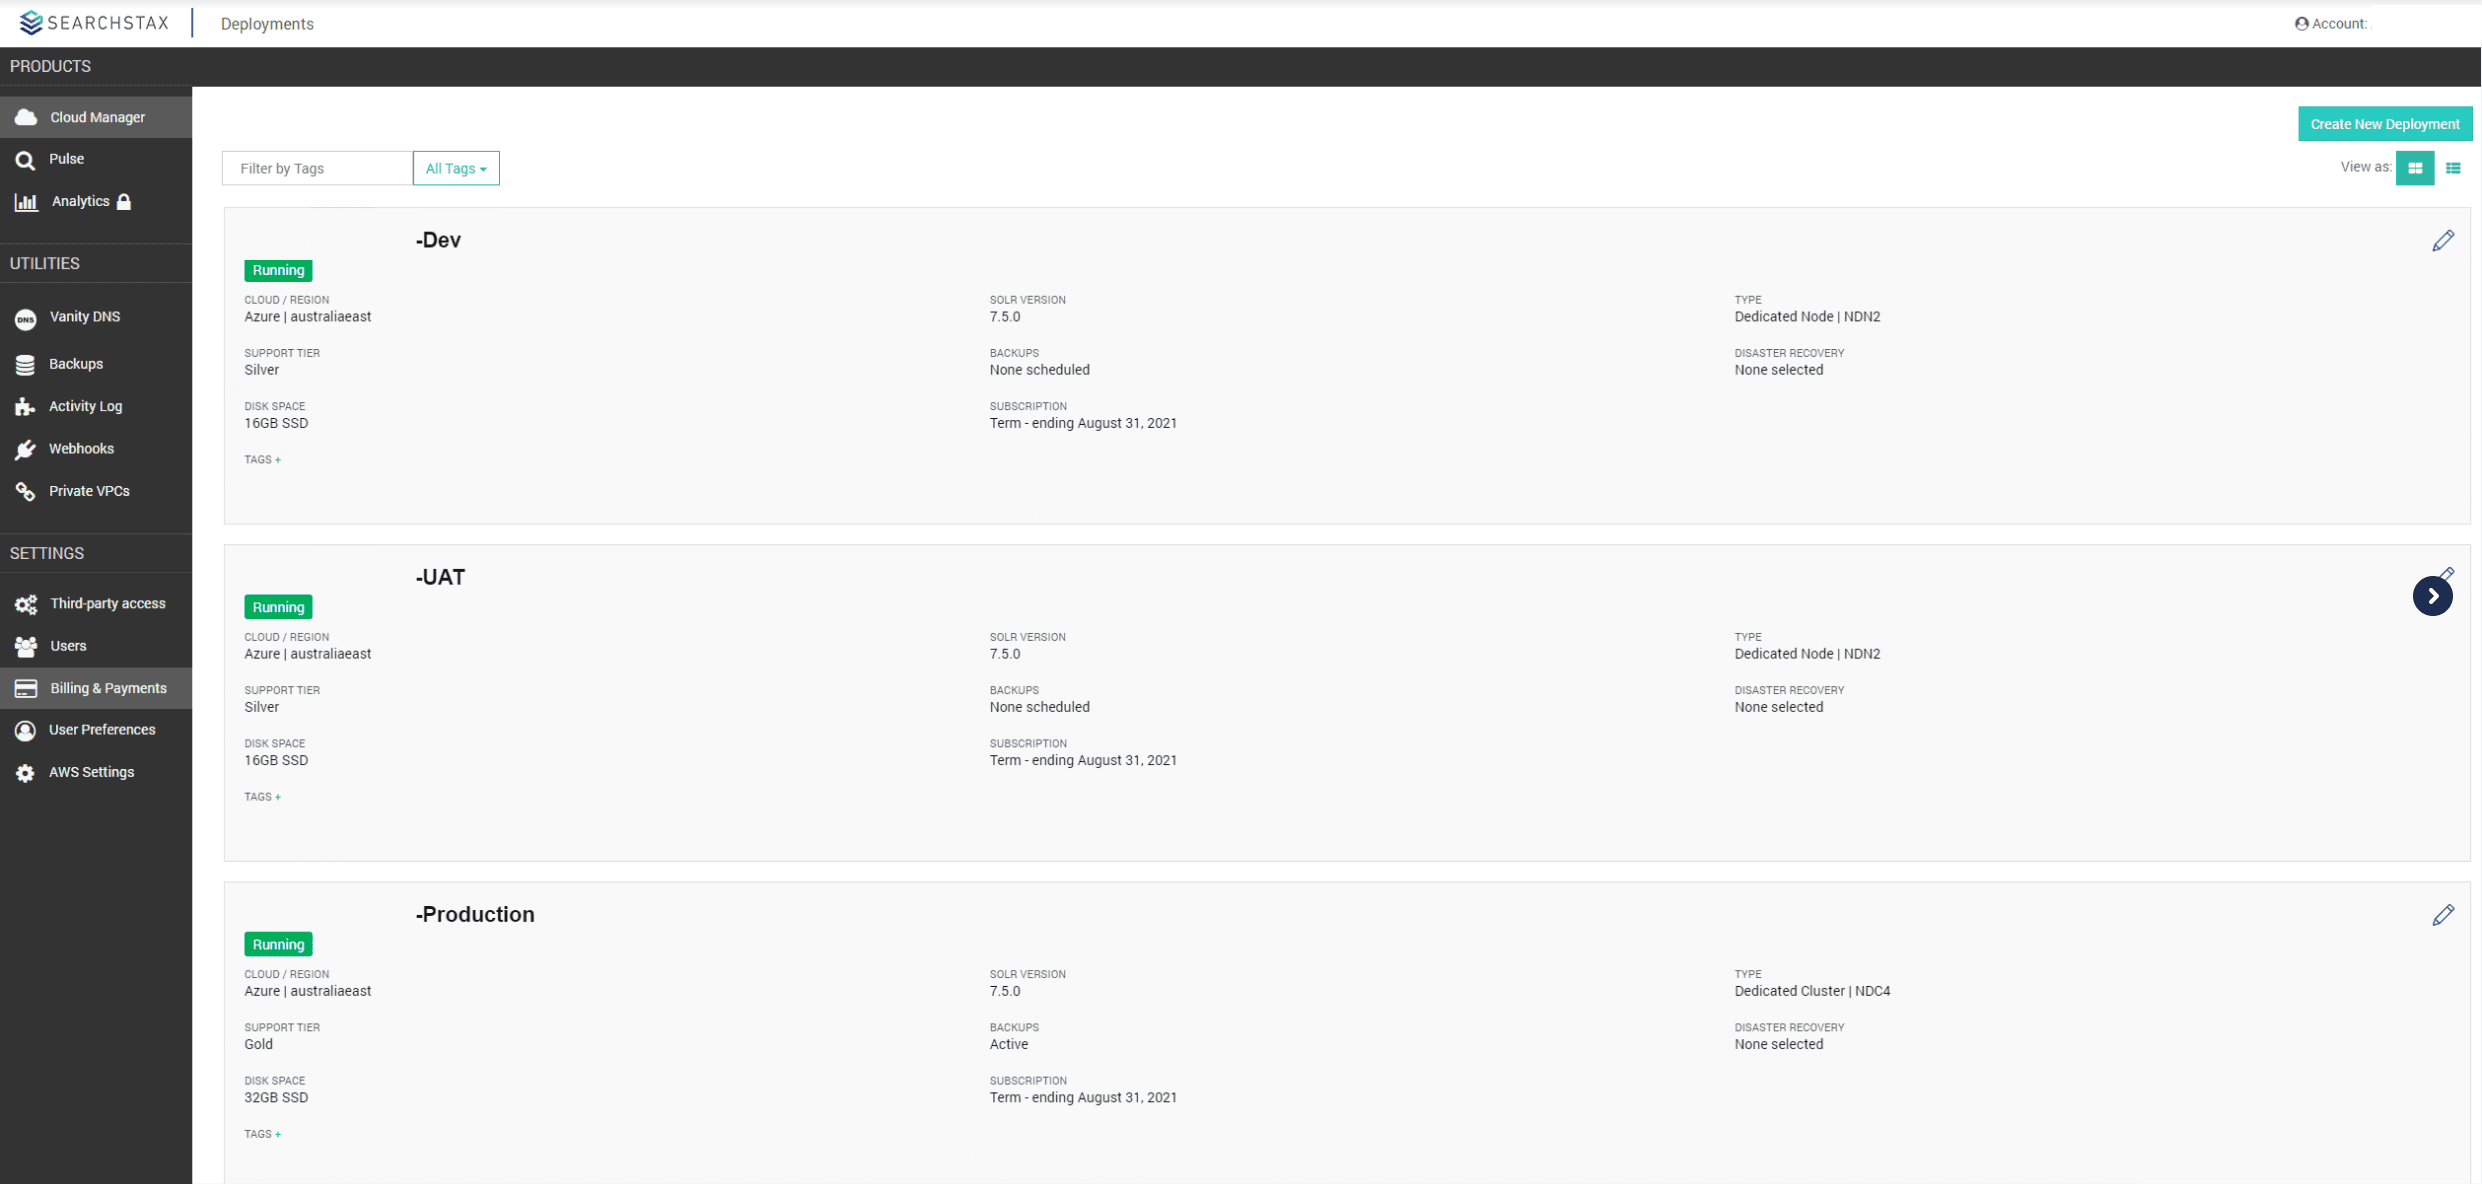
Managing Solr Users
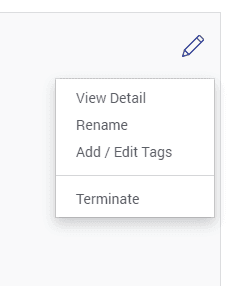
It's recommended to create Solr user accounts to lock down the environments further and that is managed by clicking the edit icon on the right and choosing View Detail.
The next screen contains the information we need to configure SOLR for our environments. To create a user, on the Security Tab, select “Auth” and crate a user.
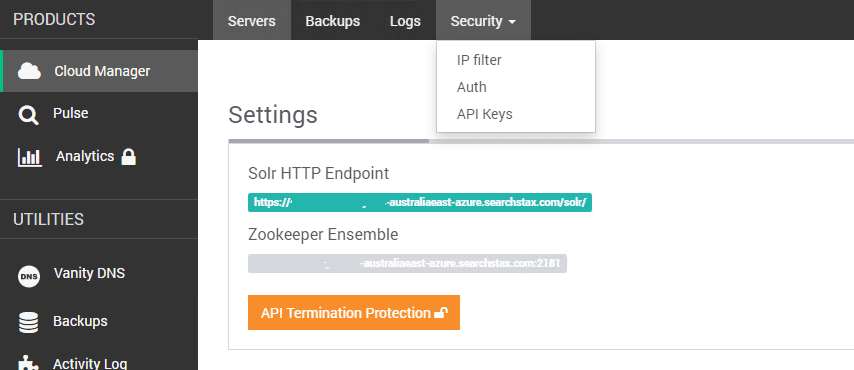
SOLR Endpoint and Connection String Values
The HTTP Endpoint is the url to get to the SOLR portal and view SOLR directly. We craft our connection strings using this and some additional params like so:
https://solruser:password@yourendpoint-australiaeast-azure.searchstax.com/solr;solrCloud=true
These string values can be added to the Project CI/CD Release Variables area to be used during releases based upon your environment.
Creating the Sitecore Solr Cores
For each environment, we need to push the Solr Cores up so that Sitecore can utilise them. There is a bunch of Doco here:
You can use some SearchStax tooling to aid with getting the bulk of these cores created: https://github.com/searchstax/searchstax-sitecore-plugin/releases
This plugin has a pre-requisite of PowerShell Core. Please see this page for details on how to install it and run this plugin: https://sitecorebasics.wordpress.com/2019/11/30/searchstax-with-sitecore-azure-paas/
Running Powershell Core as admin, change into the Tools root directory.
cd C:\projects\myproject\tools\searchstax-sitecore-plugin-1.7
Open the yaml file in this location and update it with the configuration values from your searchstax instance and Sitecore installation type. Eg.
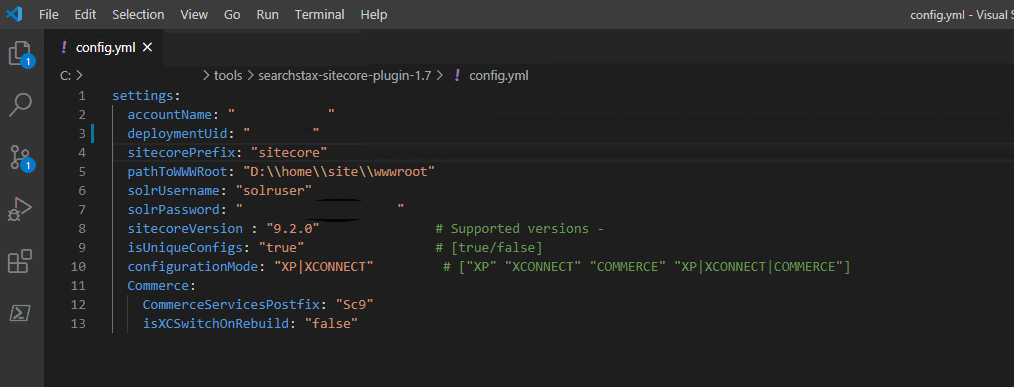
When promted for username and password, use the credentials you use to access the SearchStax management panel here: https://app.searchstax.com/admin/deployment/
If your solution is using SXA, you may need to additionally create those cores (and any other your custom search index cores your solution might use) depending on the version of your Sitecore solution and the SearchStax tool you're using.
Creating Additional Cores
All of this above is aimed at the standard Sitecore Cores, but what if you have additional indexes/cores for your solution?
Lets assume you're on an older version and need to deploy the SXA Cores for SXA Master and Web.
https://www.searchstax.com/docs/ Go to this page and use Step 4 to upload your additional cores. You will need to download the SXA Cores and have those available to upload the configuration and then the core as documented here.
Grab the SearchStax-Client Repo from Github and put it into your project repo in a tools folder somewhere alongside the SearchStax-Sitecore tool.
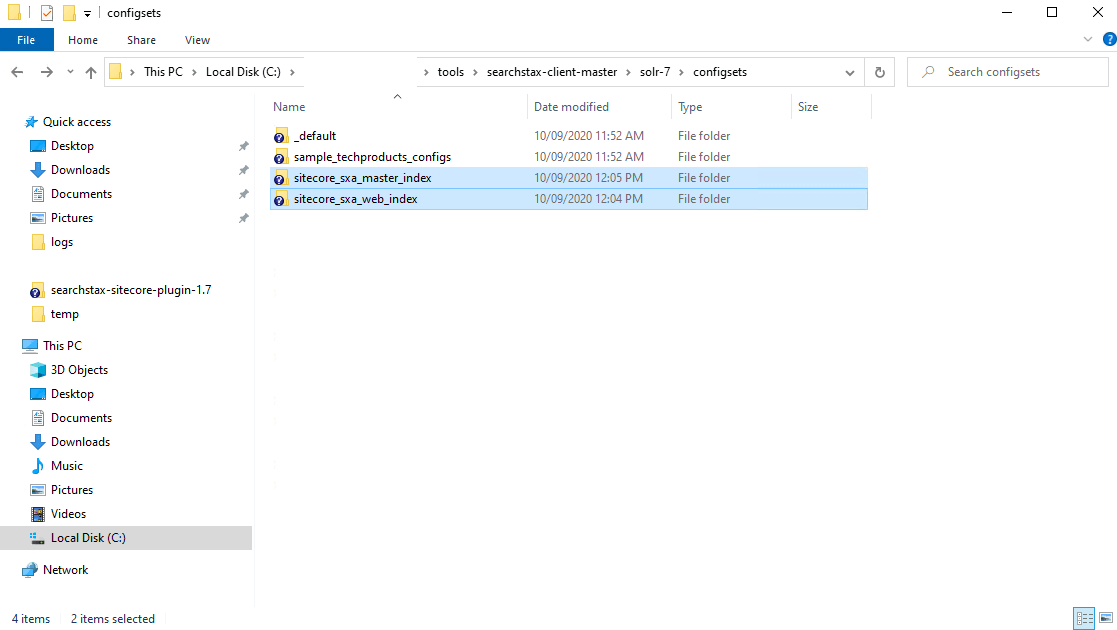
Locate your SXA Indexes (easiest to grab from your local Sitecore installation Solr Directory and copy them into the SearchStax-Client/Solr-7/configsets directory (use your solr version) like so (copying from your local solr to the tools config sets folder for the right version of solr:
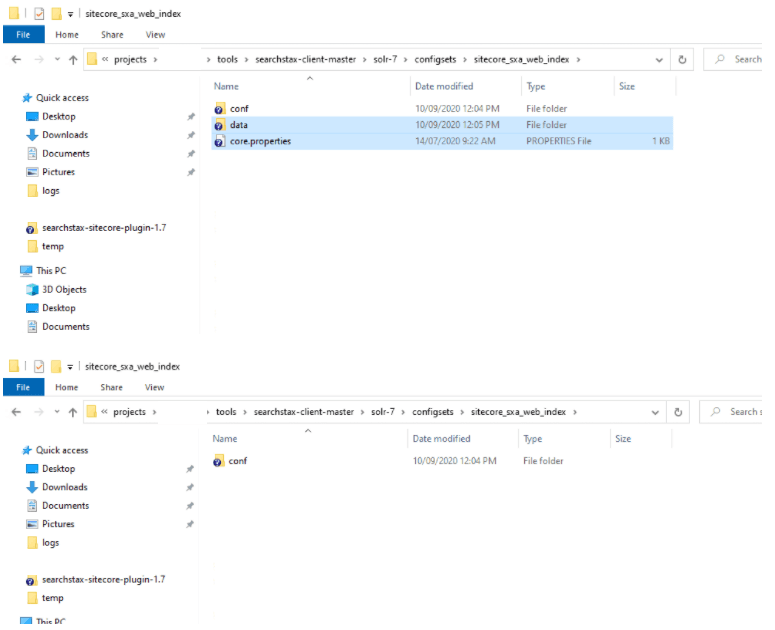
Delete the data and core.properties folders so that the only thing in the folder is the conf folder like so:
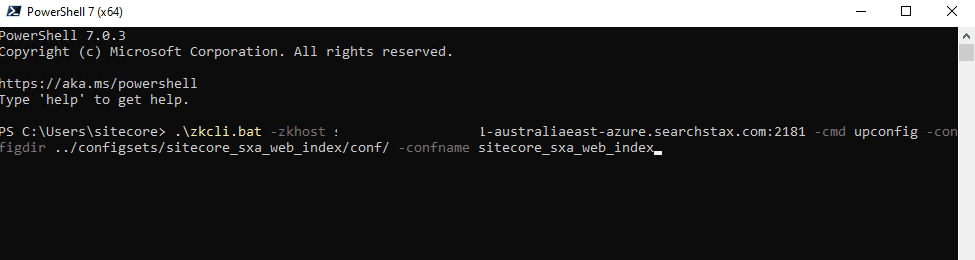
Open your Powershell.core as admin and plug in your values to the command as per the doco once you’ve changed into the correct directory related to your version of SOLR so that you’re in the folder with the zkcli.bat file to run the script:
cd C:\projects\myproject\tools\searchstax-client-master\solr-7\scripts

.\zkcli.bat -zkhost <zookeeper URL> -cmd upconfig -confdir <Solr configuration> -confname <configuration name>
Follow the remaining steps from this page section 3 & 4:
https://www.searchstax.com/docs/
Example:
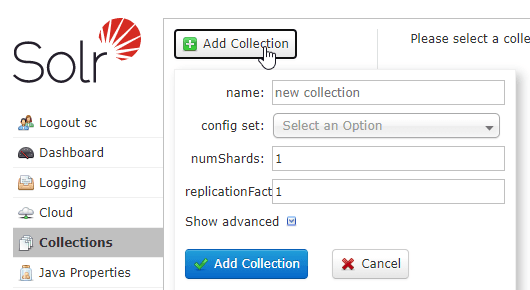
Add your Solr Collection
The next step is to log into the Solr interface and add your collection. Click Collections in the left hand menu, Click on the Add Collection button, and then select your new core from the “config set” drop down menu. If your cores were correctly created in SearchStax, the core you want to add should be in the list now. Use a name that matches the value you select in config set.
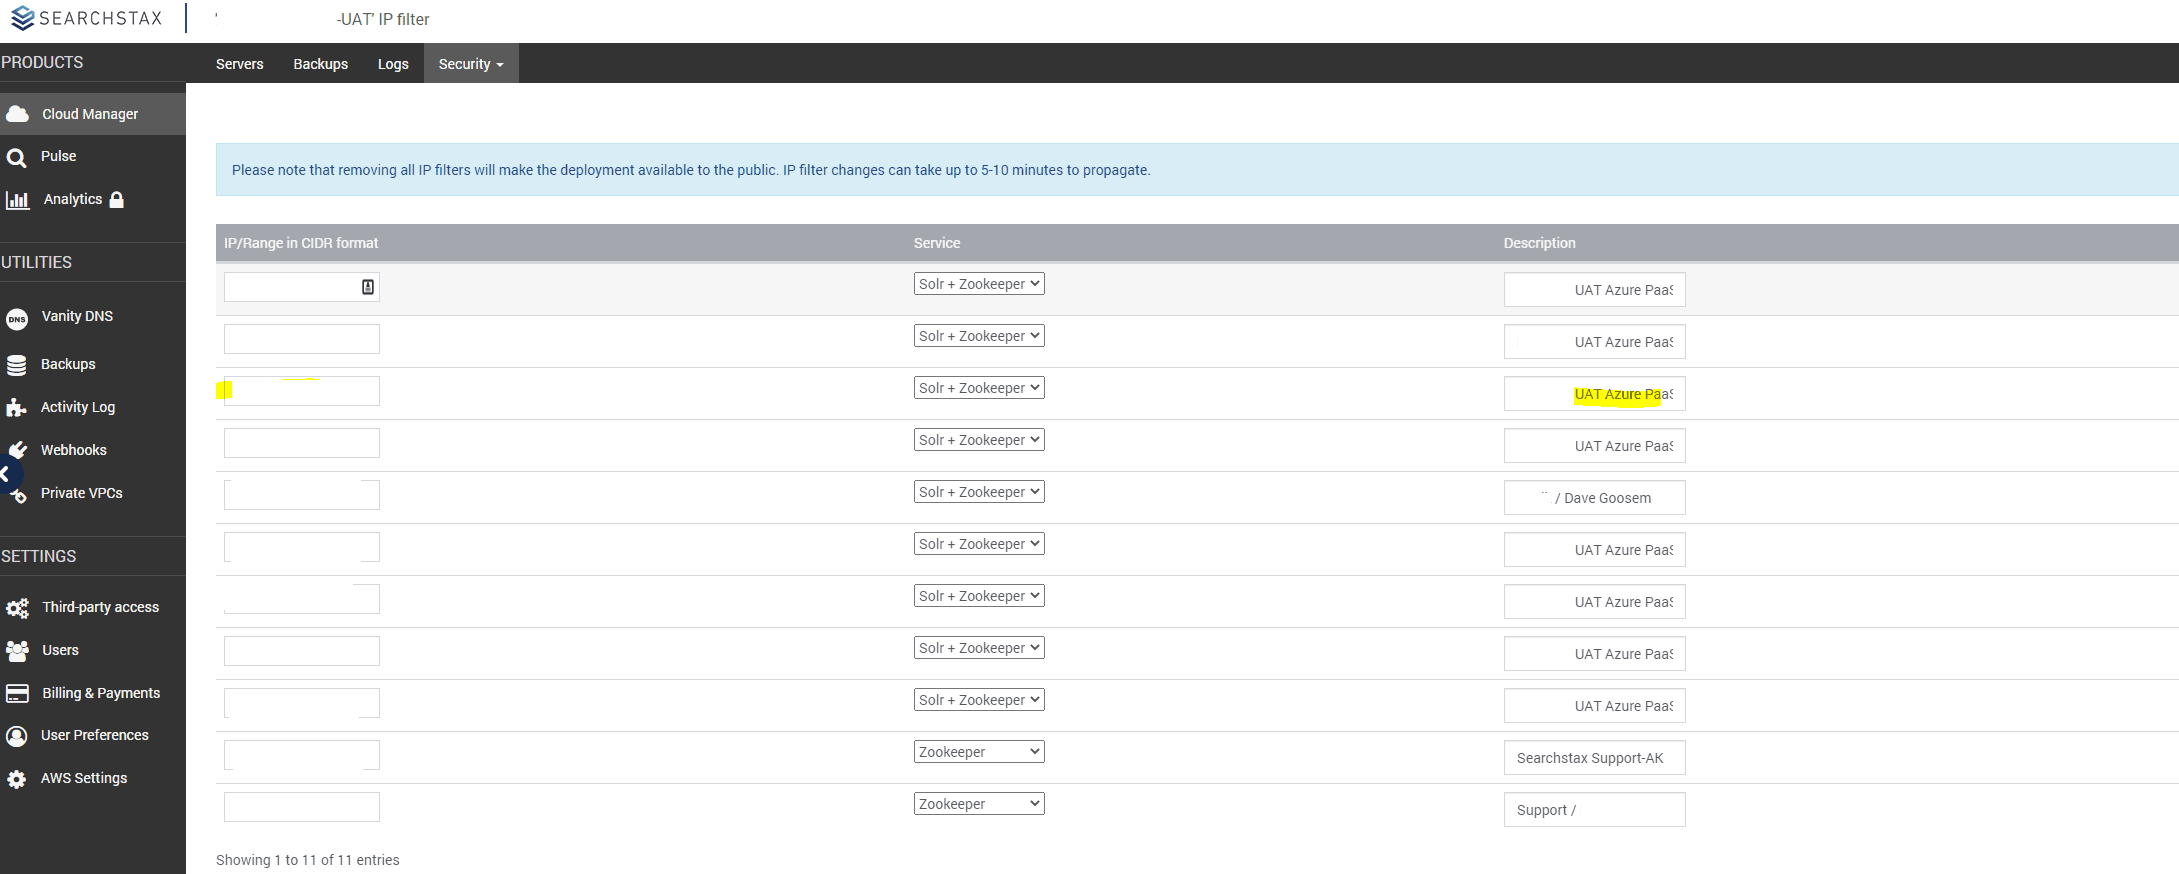
In the environment connecting to your SearchStax environment, grab the IP(s) to white list with SearchStax and insert each of your ips as required:
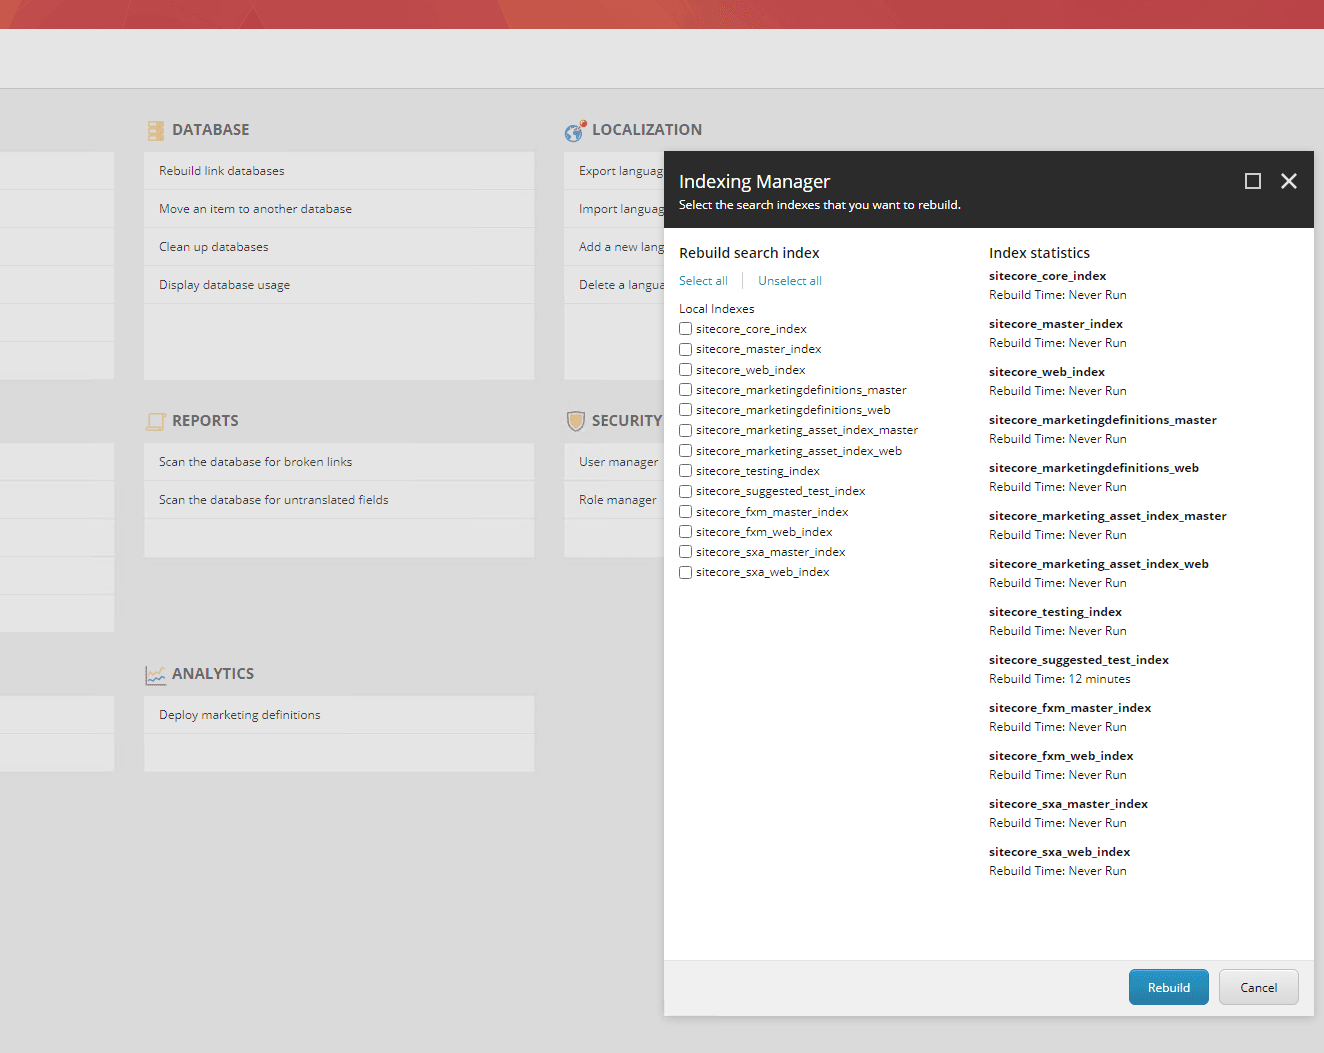
First time Deployment/Configuration of Search Stax
**Run the “Populate Managed Schema” for all indexes firstYou’ll need to run a rebuild of each index (best to do this individually for each index).
Each standard index should be run seperately
Some of these steps vary depending on if you're standing up a new environment or replacing your custom solr solution with a new SearchStax solution. If you need to, run the xdb index rebuild. You may need to go and locate all the Solr connection strings and update them with the new ones for example.
XDB Indexes
For the XDB indexes, we’ll need to trigger the remote rebuild by:
- Go to the server where the xConnect Search Indexer is running and open a command line.
- Go to the xConnect Collection Search IndexWorker folder:
<xConnect Collection Search service root>\App_Data\jobs\continuous\IndexWorker. - Run
XConnectSearchIndexer -rr(alternativelyXConnectSearchIndexer -requestrebuild). The command registers a small document in the live core signaling that the rebuild should be started. The xConnect Search Indexer will notice the document and start the rebuild process.
If it’s a PaaS instance you might need to connect via Kudo in the Azure Portal.
That's it. You can now enjoy your SaaS Solr environments and let SearchStax take care of the upkeep/maintenance, DR replication and so on.