
Unit Testing & Automation with Storybook and GitHub Workflows
- Authors

- Name
- David Goosem
In this article, we'll explore how to leverage Storybook and GitHub Workflows for unit testing and automation in a modern development pipeline. We'll cover key architectural drivers, the anatomy of Storybook stories, running tests locally, and integrating workflows for linting, unit tests, and visual regression testing.
Storybook and Key Architectural Drivers for Unit Testing and UI Testing
We are using Storybook to drive our unit tests. The main reasons for this are:
Separation of Concerns:
We need to ensure that unit tests are testing against static/mock data so that we are ONLY testing the code and not performing integration tests with Sitecore Layout Service data (which can be changed via CMS and poses a risk in itself).Reusability of Mock Data:
We are already creating static/mock data for Storybook stories. Storybook stands up a virtual/working DOM, which streamlines our unit tests as they can utilize this same instance without the need to recreate a virtual DOM in our tests.Built-in Plugins:
Storybook has plugins that already handle much of the heavy lifting for us.
Storybook Addons
Jest is the recommended unit testing library for Next.js.
Storybook provides several plugins that simplify writing and running Unit Tests and Accessibility Tests. These plugins integrate with Jest and A11y, leveraging the best tools available. Below, we explore some of the key plugins used in our setup.
The @storybook/addon-interactions addon allows you to test and simulate user interactions within your Storybook stories. It is particularly useful for testing the behavior of components in isolation by simulating events like clicks, form submissions, and other user actions.
The @etchteam/storybook-addon-css-variables-theme addon we're using to allow to switch between our different brand themes in Storybook for each component. We're sharing components across many different sites, so this is a great way to see how a component looks in each brand theme without needing to set up multiple Storybook instances or stories with the themes set.
The @storybook/addon-essentials package is a collection of commonly used Storybook addons bundled together to simplify the setup and enhance the development experience. It includes a set of tools that cover the most common use cases for Storybook users.
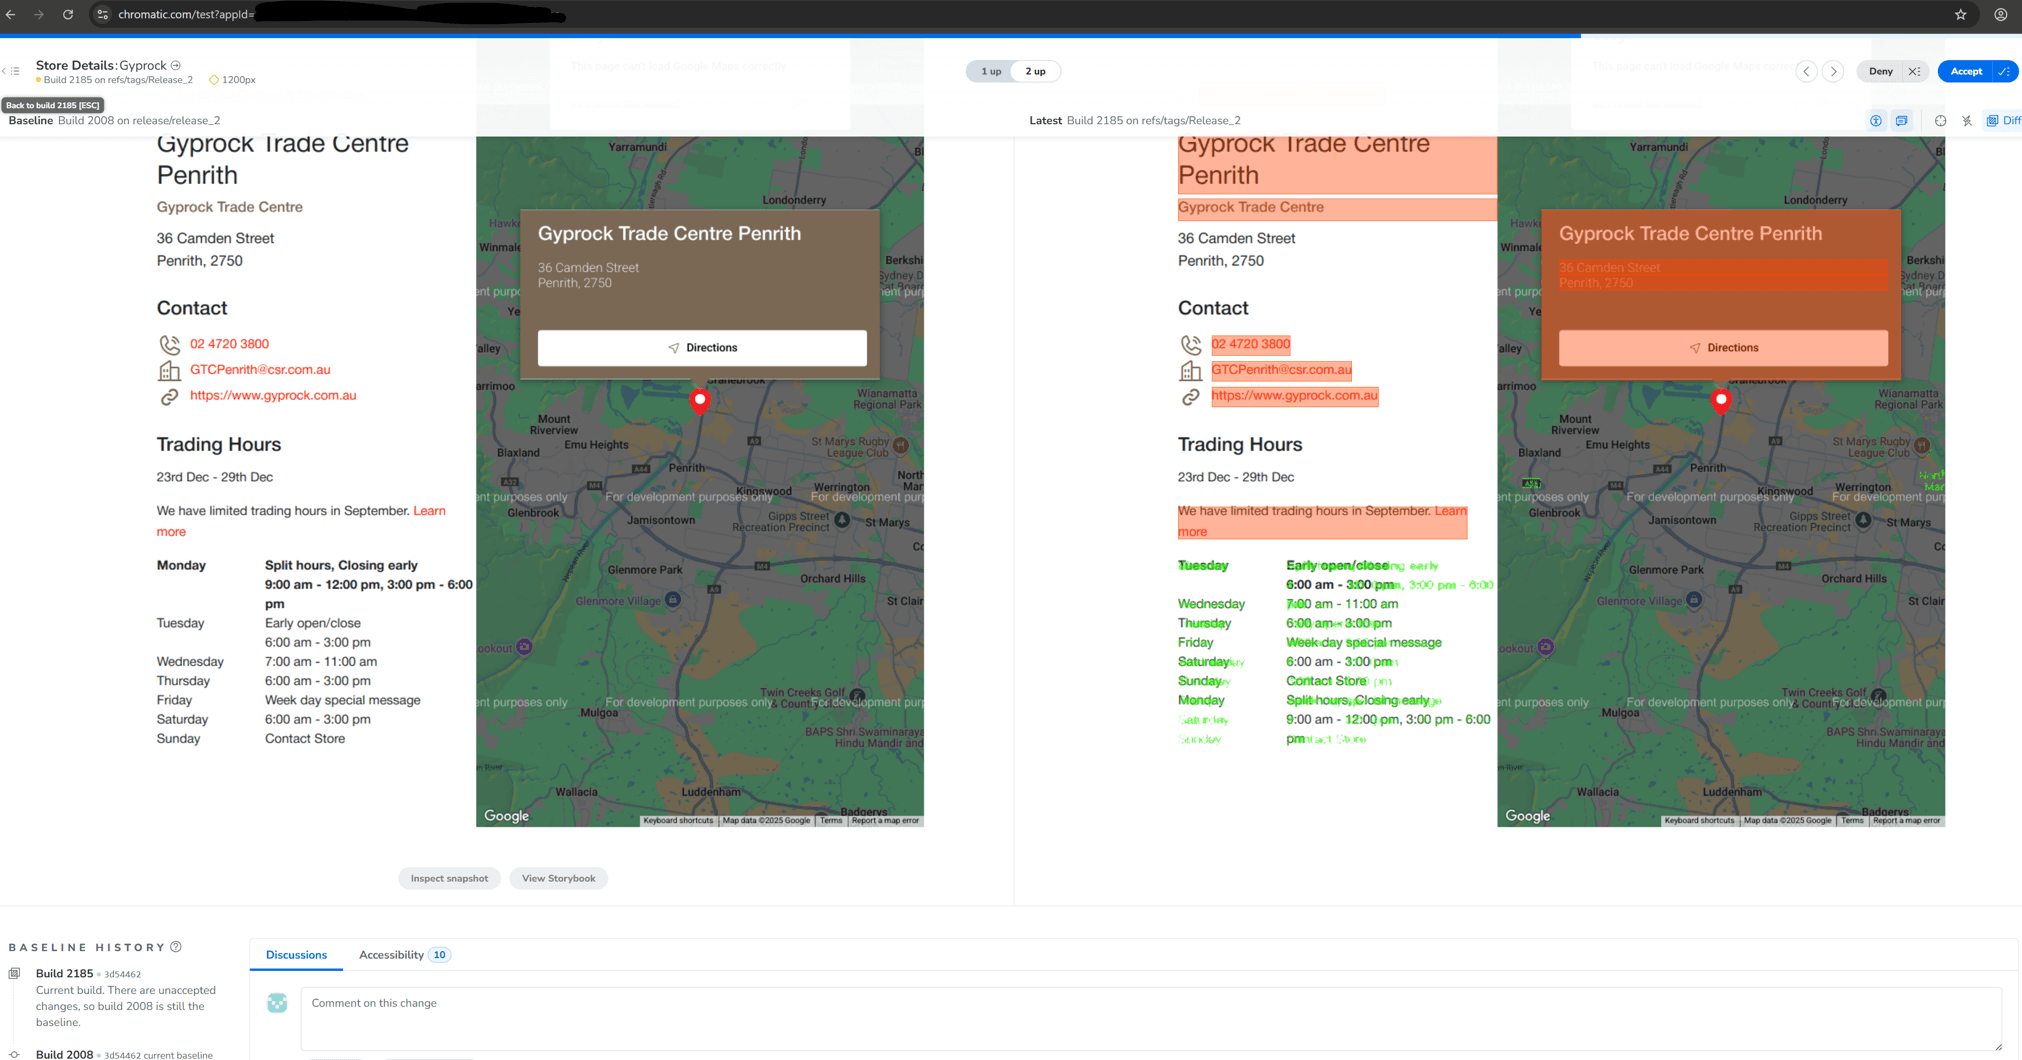
The @chromatic-com/storybook addon is a tool that integrates Chromatic with Storybook to enable visual regression testing and UI review. It allows you to capture and compare screenshots of your components across different states and themes, ensuring that changes to your components do not introduce unintended visual differences. We're going to look at this in more detail later.
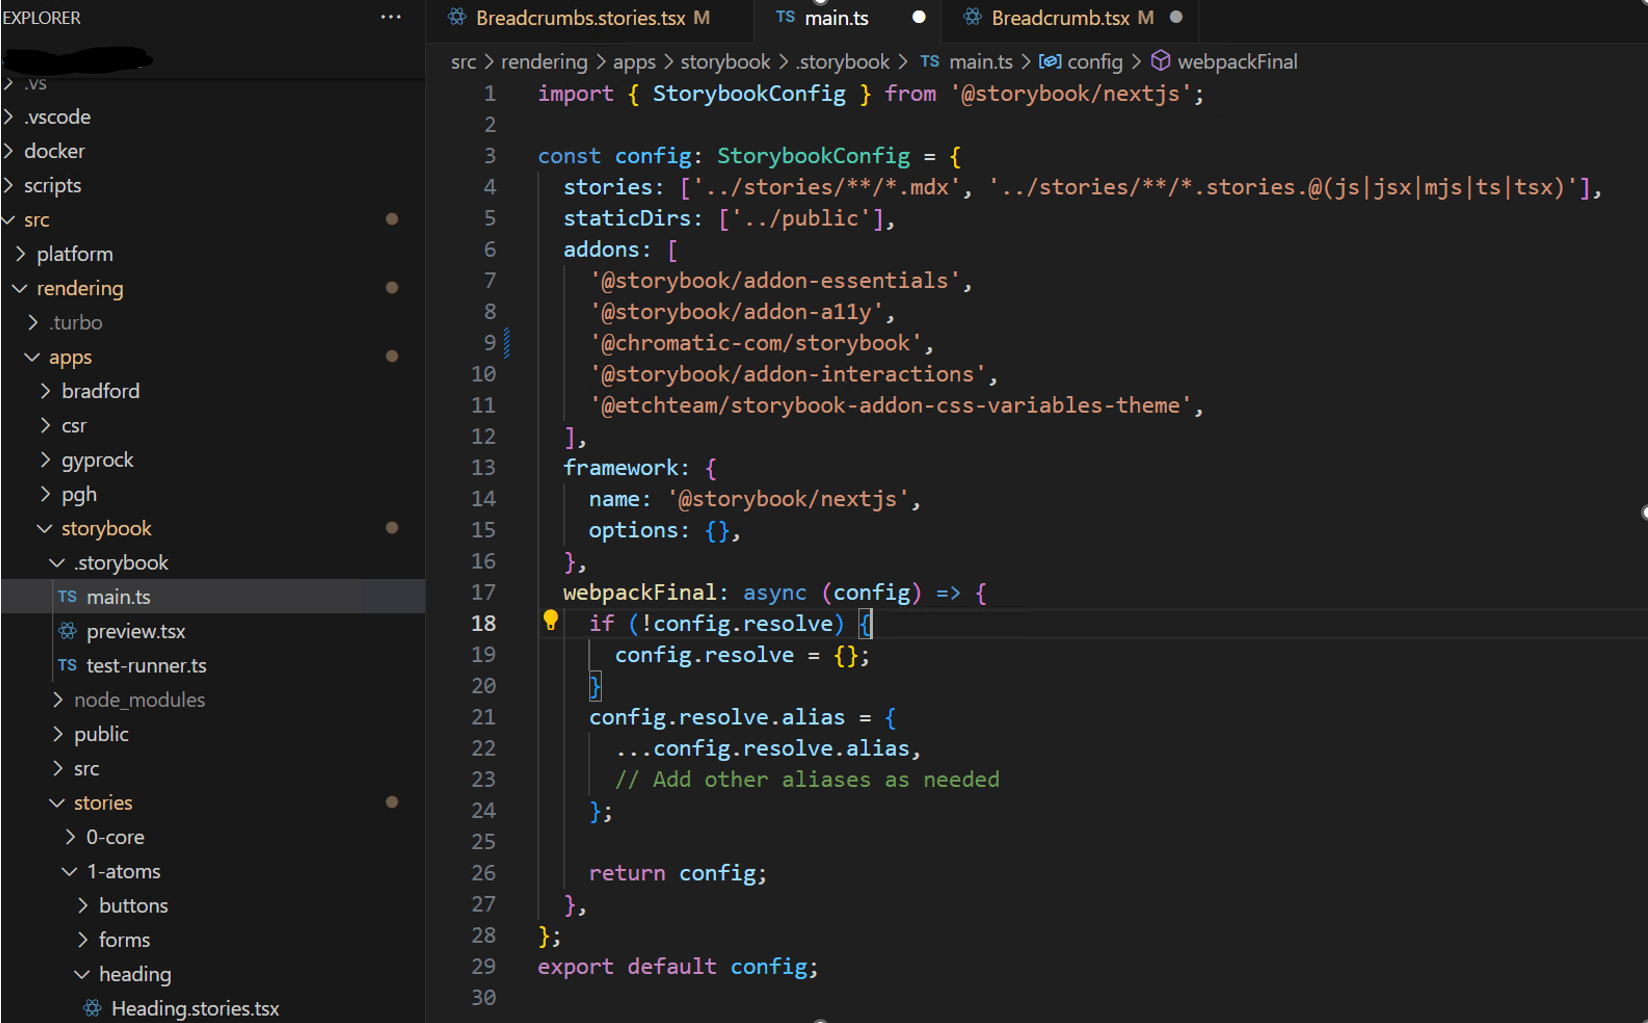
The Anatomy of a Storybook Story
Below is an example of the anatomy of a Storybook story. This example demonstrates the Atomic Heading Element in our solution:
argsSection:
This is where we set up the mock data we want to pass to our component.renderSection:
This is where we set up the Storybook render clause to display the story within Storybook when it runs.playSection:
This is where we write our unit tests.
Running Unit Tests Locally
Start Storybook:
You MUST be running Storybook already from theApps/Storybookapp folder.Run Tests:
Open another console in theApps/Storybookapp folder and run the following command:npm run test-storybook
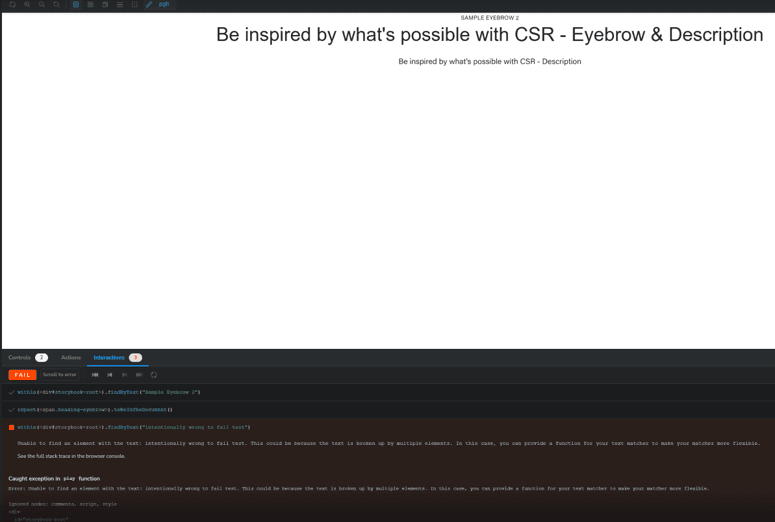
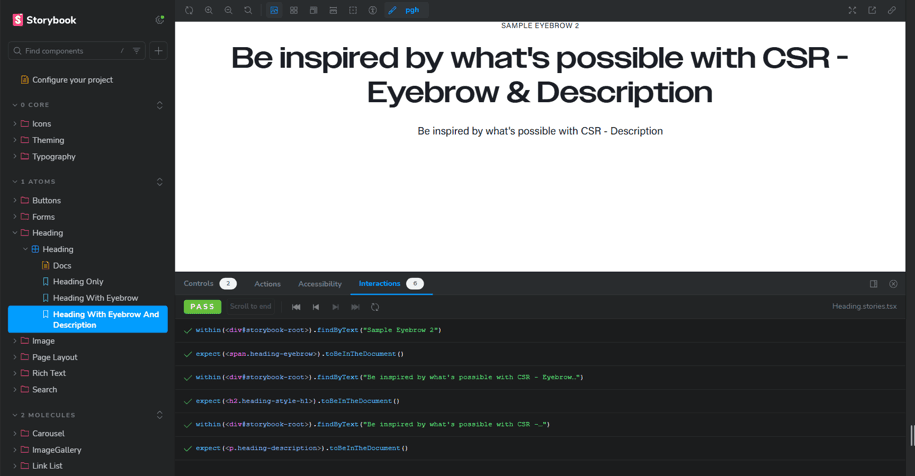
Live Updates in Storybook
In the running Storybook area, the Interactions tab will present your unit test conditions and a PASS or FAIL status. If you update a test and it fails, this will auto-reflect in this section if Storybook is already running. This eliminates the need to run the full test suite while actively working on tests.
Example of Live Updates In the example below, I’ve intentionally modified a unit test to break it. You can see the live-updated test output in the Interactions window:
Reference Documentation
Storybook Test Runner Import Stories in Tests
GitHub Workflows and Checks Against Incoming Changes
See below for the Storybook guide to setting up GitHub Workflow scripts. Note: we made some adjustments to this to work with our solution. GitHub Workflow Guide
GitHub Workflow Files The GitHub workflow files are always stored in the .github/workflows directory. GitHub uses this convention to know to run workflows configured in this directory.
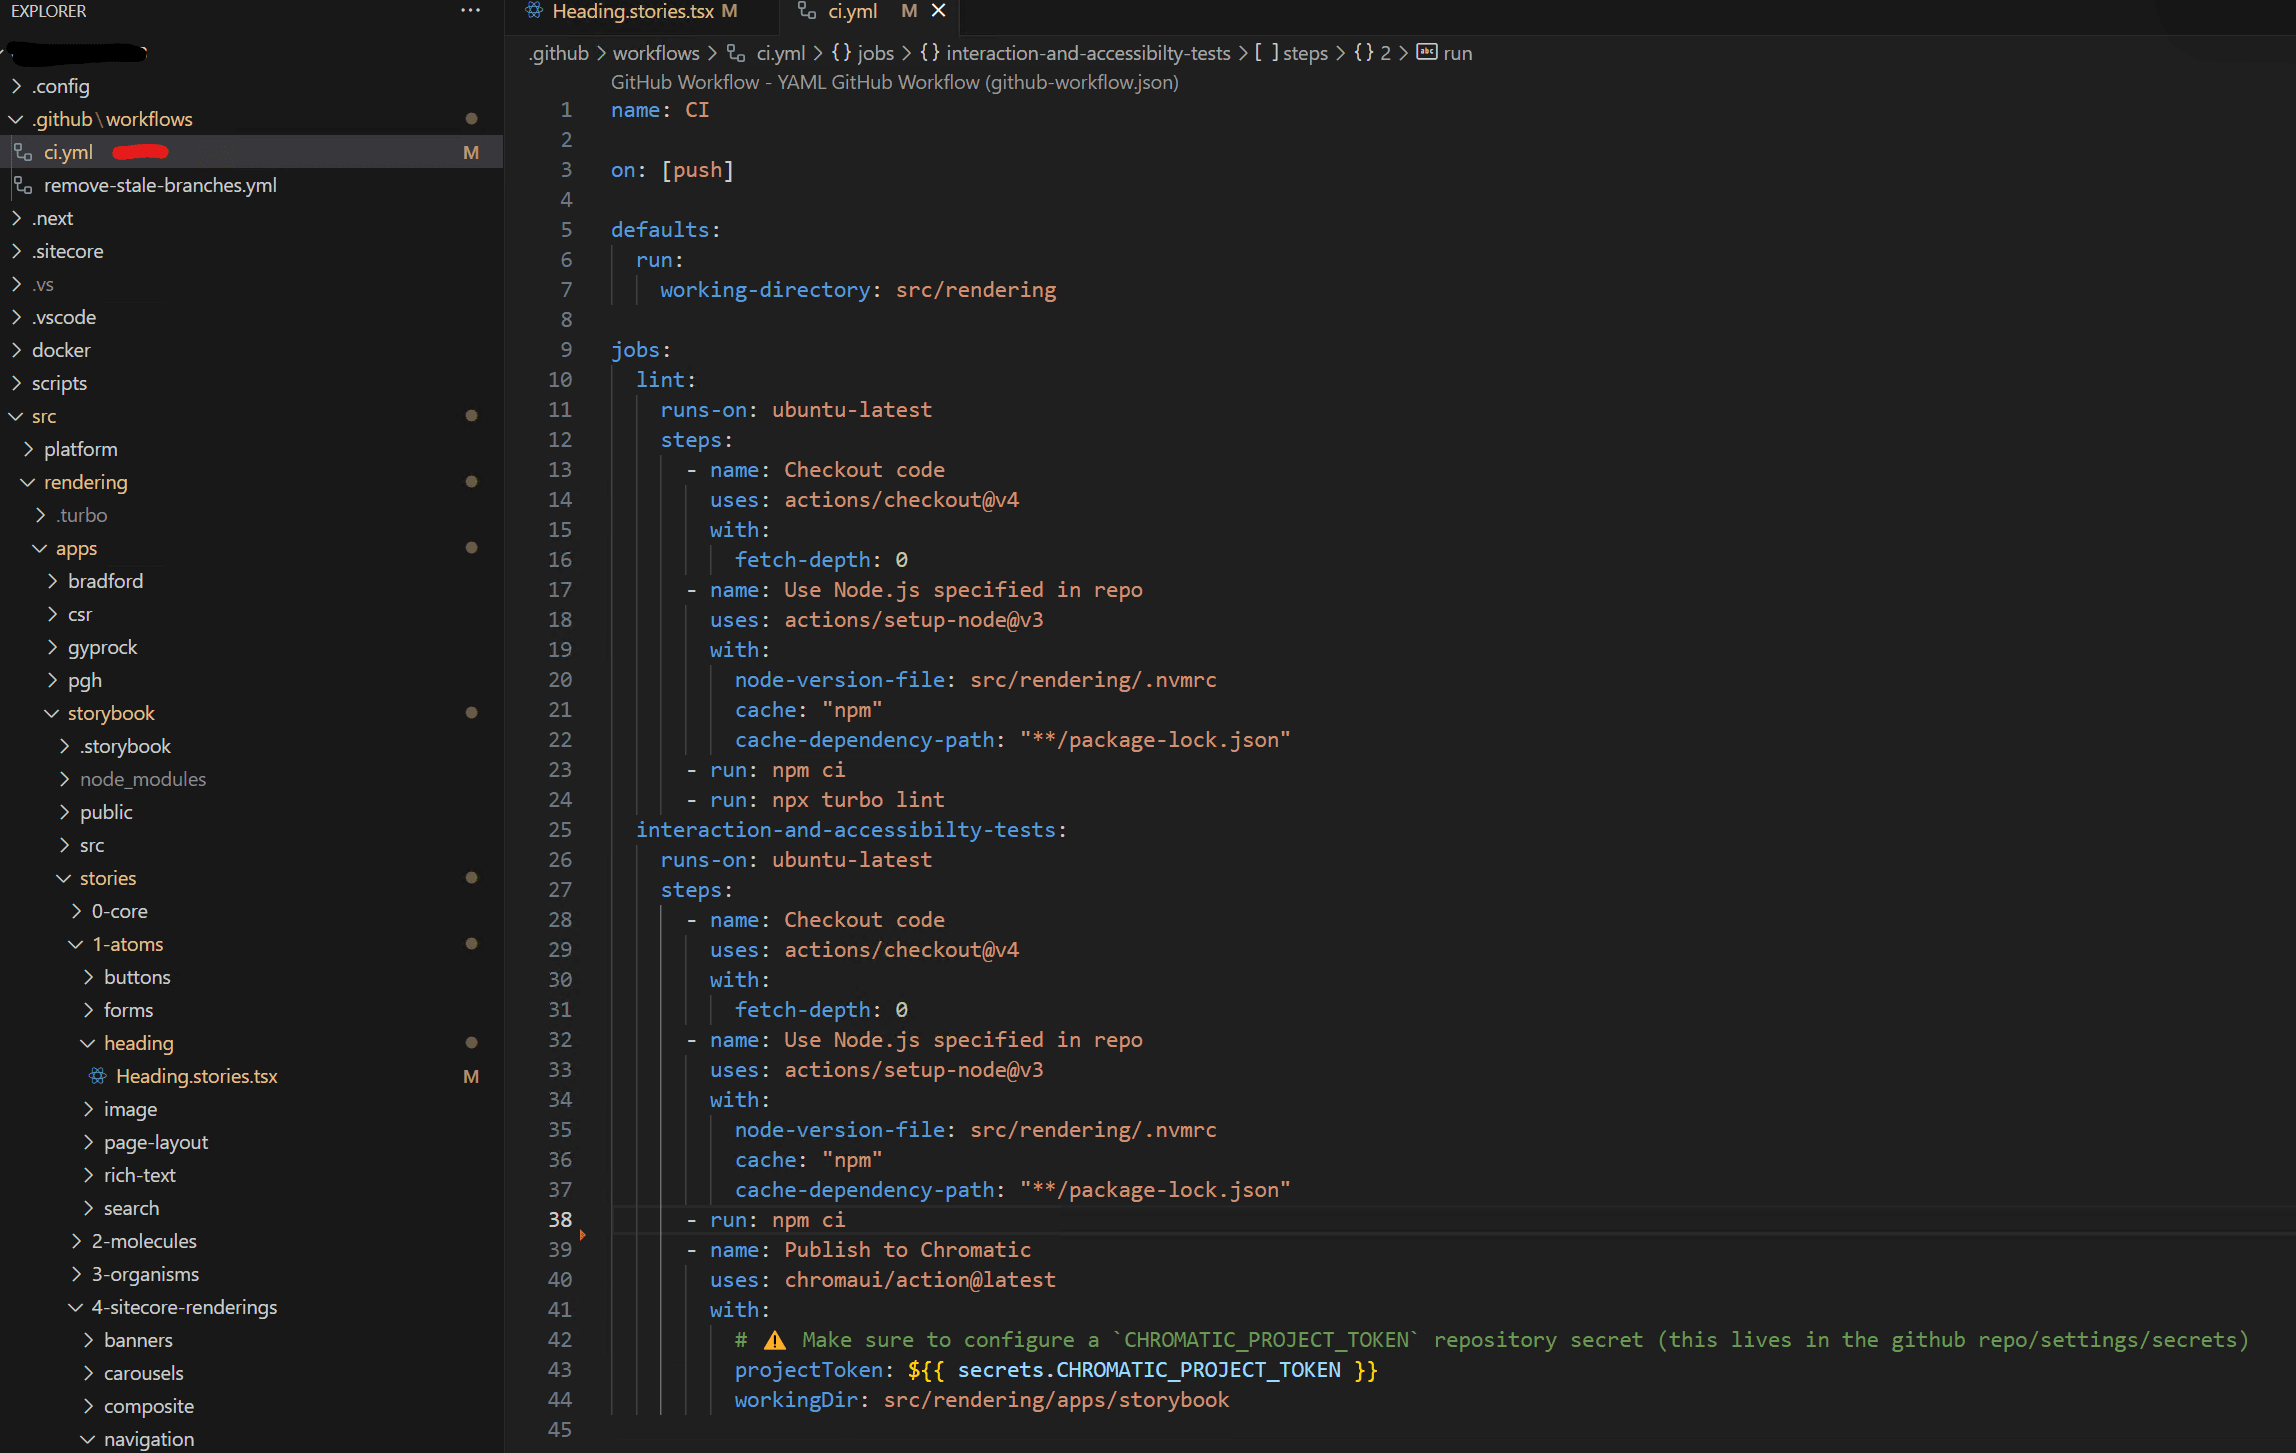
Workflow Steps
Linting: Enforces code quality and standards.
Unit Tests: Ensures code quality, confirms changes are intentional, and considers existing logic. Unit tests can also check against accessibility and business/code logic to ensure everything works as intended.
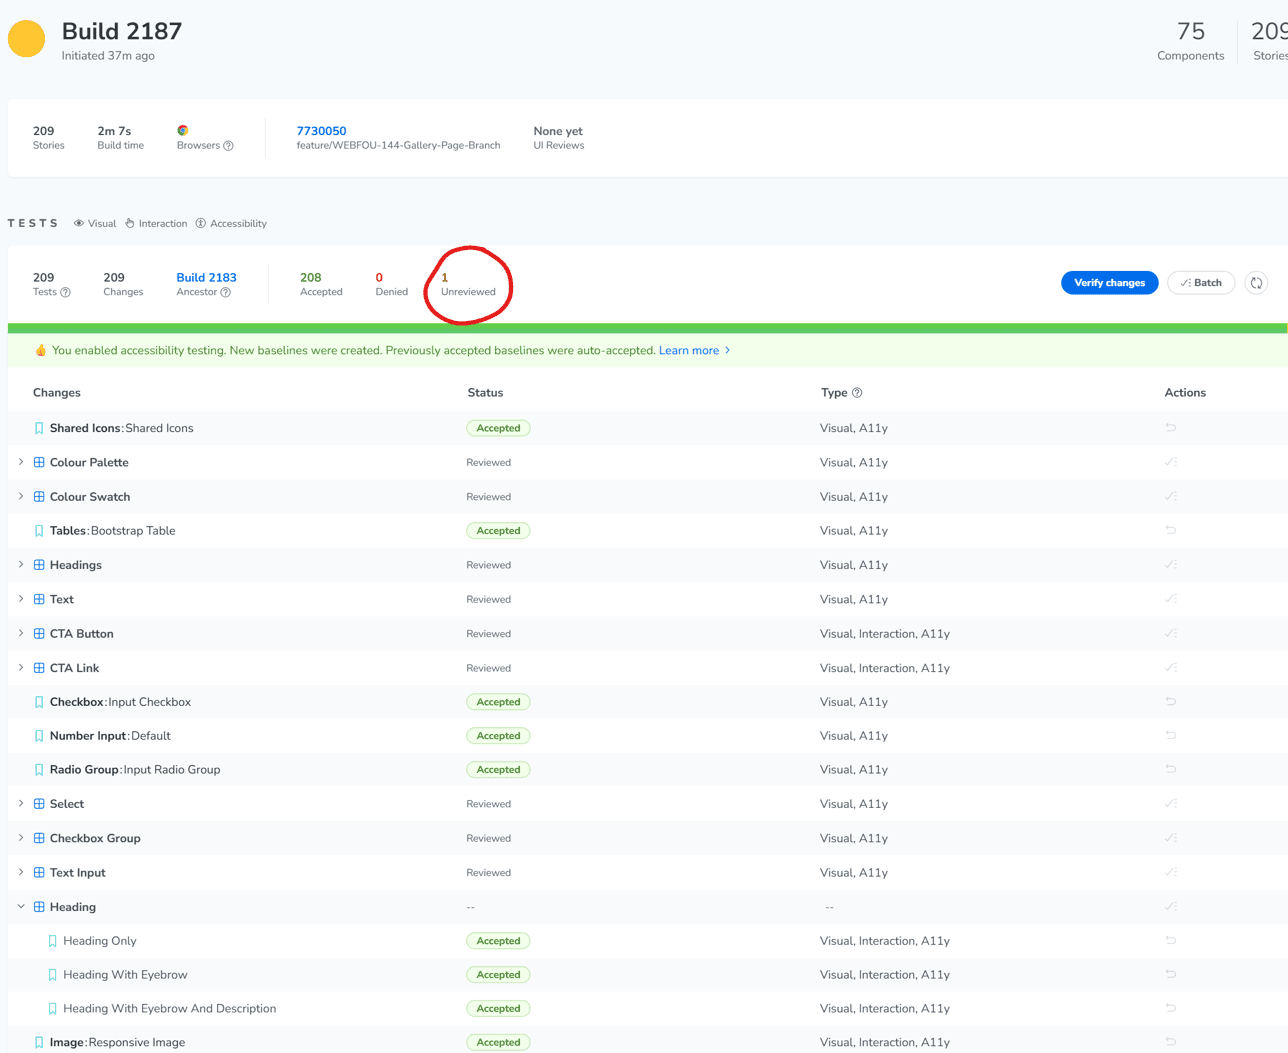
Chromatic: Visual regression testing
What does it look like?
PR get's raised with changes. The GitHub workflow runs the linting and unit tests first. If these pass, it then runs Chromatic to check for visual regressions.. If any of these steps fail, the PR cannot be merged until the issues are resolved.

Chromatic Setup/Configuration
Sign Up: Use your email to sign up and create a new project.
This looks great, how do we set Chromatic up so we can configure it in our Workflow above? (Screenshots below are for a free/trial version and are example values only)
Install Chromatic:
Run the following commands:
npm install --save-dev chromatic
npx chromatic --project-token=chpt_abc123234234
Note: The
Complete Setup: You can't click the Next option in the Chromatic setup until this is done.
Summary
This article provides a comprehensive guide to setting up unit testing and automation using Storybook and GitHub Workflows. By leveraging these tools, you can ensure code quality, streamline testing, and maintain a robust development pipeline. Let me know how you get on with this approach or if you have any questions!